P3 D-CJ: The Dirt-Cheap Jumper (Kind Of)

One of the few images from the original Marketplace listing…
by Sandro Surabischwili
August 3, 2022: a 2001 Specialized P.3 for just $175 appears on Facebook Marketplace. Within five seconds of test riding it, which was within an hour of finding it online, $175 exchanged hands and the P.3 was on the roof rack of the 325xi, racing down the highway back to “HQ”…
What follows is a year of building, designing, developing, and some riding too.
While the old P3 rode smoothly, it was covered in peeling stickers and a dead, green paintjob reminiscent of an army surplus storefront. Suddenly, a beater bike to mess around on became a project…
A few days and dozens of Dremel sanding discs later, all of the flat green paint was now in the filter of my respirator, revealing the lovely aluminum frame within. Next, the extra cable stops for the front derailleur were grinded away on the non-drive side, and, in compliance with the self-imposed “minimal budget”, custom 3D-printed decals, and a hand-drawn accent on the head tube under multiple coats of KBS Diamond coating finished off the build (or so I foolishly thought).


After a few runs at the local spot, it became clear that the geometry was a bit too cramped with the 50mm rise Black Market handlebars, 60mm Kooka stem, and 175mm Truvativ crankset. Those components were removed, sold on eBay, and (mostly) funded a shorter, narrower, and flatter Truvativ cockpit matched with 165mm Descendant 7k cranks.
After a few more weeks riding, the decent but too temperamental Avid BB7 brakes finally whittled away the last of my patience, so they were pulled to partially fund a pair of fresh Deore M6100 brakes - just about as good a hydraulic brakeset as you can get for around $150.
Shortly thereafter, I mocked up some tan-wall tires in Photoshop and was immediately sold on the look, so a fresh pair of Billy Bonkers with bronze sidewalls, matched with brown FUNN lock-on grips (funded by the take-off pair of ODI grips) gave the bike a its final theme. Further tan accents included a custom-designed BOQS mudguard for the Marzocchi Bomber fork, and matching “Java” Crankies (crank arm guards). The wheels were then rebuilt with a pair of leftover Stan’s Flow hoops that were half-stripped of paint to create a unique two-tone wheel of raw aluminum and black.

The original Photoshop render of tan-wall and half-n-half rims…

The resulting build.
Cool, now it was time to go learn some tricks and stuff, right? Well…
I wasn’t too thrilled with the gearing which was a bit too heavy for the all-around riding I kept telling myself I’d do on this bike, so I swapped in a slightly bigger rear sprocket...
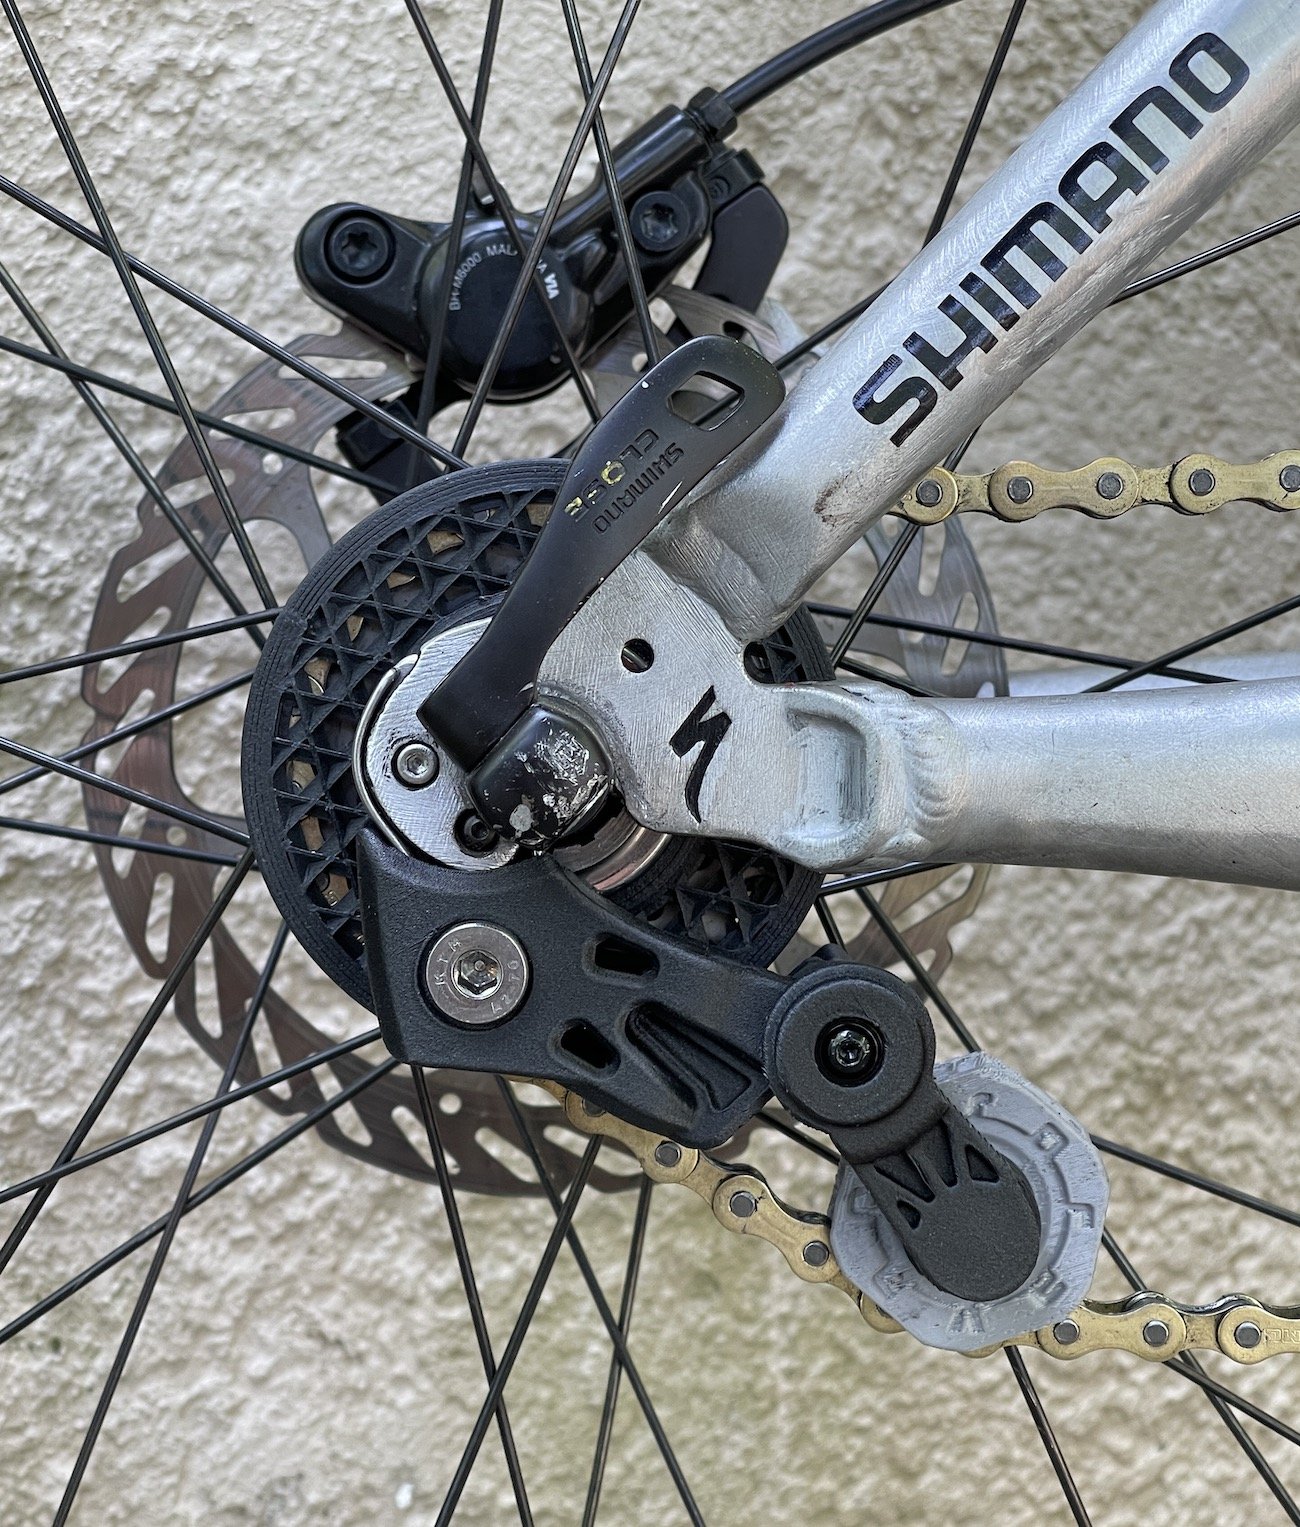
…but unfortunately, this sprocket and chainring combination made setting the chain length and tension impossible (even with half-links), so it was time for a chain tensioner.
But:
Was this an opportunity to explore something novel instead of speccing a low-end Shimano tensioner or a super-high-end boutique one? Especially in honor of the original vision for a low-budget but durable, cool bike?
Could my experince with Nylon composite 3D printing materials save me some money on this build?
Fast-forward a few months of design, prototyping, testing, and some crashing, and the Tensionero composite chain tensioner was born*. Designed to fit exactly to the derailleur hanger on the bike (to maximized clamping force) and paired with a rear hub-mounted chain retention disc, it uses the uniqe strength and slight flexibility of glass-filled Nylon composite to apply tension to the chain, while retaining enough flex in the entire system to allow for the minor chain elongation that happens when tires compress during landings. What's more, Tensionero can be tuned to either let the cranks spin freely or 'lock' (the same thing that riders achieve by wrapping tire tubes around the crankset or tightening a bolt against the bottom bracket), simply by adding or removing spacers around the tensioner's jockey wheel.
*Tensionero has since undergone a design overhaul and to make it much more universal and suitable for both hardtails and full suspension setups


During development of the Tensionero, a tangential undertaking to equip the D-CJ for barspins began. In order to retain the front brake and unhappy with the available options online, I started working on SpinCap - a modular top cap system that routes the front brake hose through the steerer. Since the stem bolts are what create the majority of the connection force between stem and fork, the hypothesis was that the strength of 30% glass-fiber filled Nylon 6 would be enough to withstand the lesser forces applied through the stem cap. As a matter of fact, not much torque should be applied to the stem cap bolt as its job is mainly to initially tighten up the headset and fork crown races: about 3-5NM or so.
SpinCap features a unique, enclosed design that hides the stem bolt under a tiny trapdoor for a super-clean cockpit, and the current version continues to undergo long-term testing.


With all said and done, the final cost of just the components on this build, accounting for takeoff parts sold, came in at under $500.
Yet the hundreds of hours spent designing, prototyping, testing, and re-working some of the new components on the bike make this build quite the little paradox….